Investments Parameters
All customizable options for design and functionalities are controlled by the parameters that are entered directly as URL parameters into the iframe URL.
For Investments Accounts, our supported parameters are much the same as Banking, but do differ slightly based on the different types of accounts and information.
Please refer below for all supported parameters:
Switching between Banking and Investment Institutions
Banking and Investment Institutions| Parameter | Default Value | Valid Values |
|---|---|---|
| productType | banking | banking, investment |
Note on productType Parameter
You can use this parameter to easily switch between the types of institutions to be shown within Flinks Connect. If
productTypeis not used, only your default Flinks Connect configuration list will be shown (Banking by default)
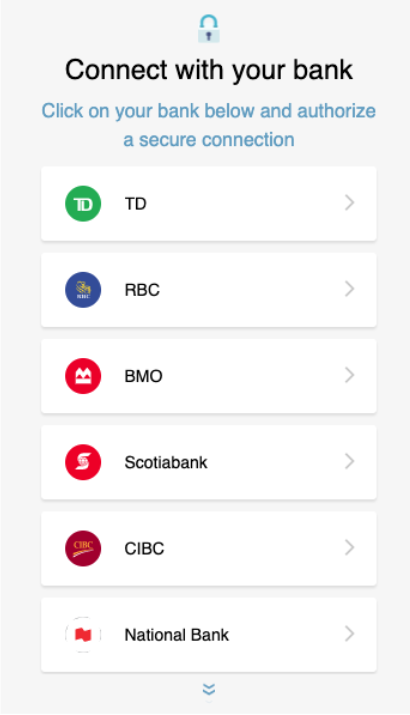
Standard Institution Display with productType=Banking
productType=Banking
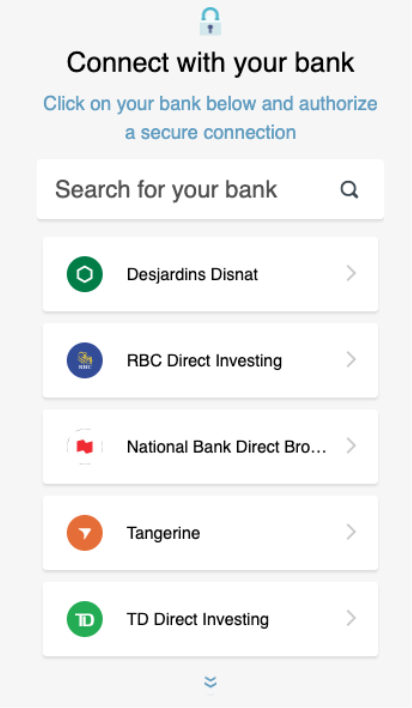
Standard Institution Display with productType=investment
productType=investment
Layout Customization
| Parameter | Default Value | Valid Values |
|---|---|---|
| institutionFilterEnable | false | true, false |
| closeEnable | false | true, false |
| headerImgEnable | true | true, false |
| headerEnable | true | true, false |
| backEnable | true | true, false |
| staticLoadingEnable | false | true, false |
Removing Buttons and Header
You can remove the back button from the Institution Login page by specifying the parameter backEnable=false. This is particularly useful for integrations that have a custom Institution Selection page.
You can remove both text and image from the header by specifying the parameter headerEnable=false, or just remove the image by specifying headerImgEnable=false.
Close Button
You can give your users more flexibility and control by adding a close button directly to the Institution Login page. To enable the close button, specify the parameter closeEnable=true. If the button is clicked, Flinks Connect will show the event {step: "COMPONENT_CLOSE_SESSION", institution: "FlinksCapital"}.
Please note that this button doesn't perform any action directly in Flinks Connect besides the event in the Event Listener.
Language
| Parameter | Default Value | Valid Values |
|---|---|---|
| language | en | en, fr |
Flinks Connect supports both English (default) and French languages for the interface. All requests initiated by Flinks Connect attempt to connect to the Financial Institution in the chosen Flinks Connect Language, which means that the Multifactor Authentication can also be prompted in the same language.
To activate the French version of Flinks Connect, the parameter language=fr must be specified.
Terms and Conditions
| Parameter | Default Value | Valid Values |
|---|---|---|
| termsUrl | none-set | string |
| termsNoCheckbox | false | true, false |
| customerName | none-set | string |
Redirect
| Parameter | Default Value | Valid Values |
|---|---|---|
| redirectUrl | https://flinks.com/contact/thank-you/ | [string URL] |
| innerRedirect | false | true, false |
| jsRedirect | false | true, false |
Flinks Connect will redirect the end user to a landing page once their account was successfully connected.
We recommend to set the Redirect URL to your custom landing page, which can be a Thank You page or a landing page specific to the next step in your process. Any parameters you have specified in the your landing page URL must be encoded.
Parameters in your Redirect URL
You must encode all parameters that are specific to your landing page URL.
✅ Good usage:
redirectUrl=http%3A%2F%2Fflinks.com%2F%3FurlEncoded%3Dtrue❌ Bad usage:
redirectUrl=https://flinks.com/?urlEncoded=true
If the parameter redirectUrl is not specified, a generic Flinks hosted Thank You page https://flinks.com/contact/thank-you/ will be set, along with the parameter innerRedirect=true.
In case the language is set to French by using the parameter language=fr, the Thank You page https://flinks.com/contact/merci/ is going to be set as default.
Nightly Refreshes
| Parameter | Default Value | valid values |
|---|---|---|
| scheduleRefresh | false | true, false |
If your use-case requires automatic account refresh to keep track of transactional history changes, you can enable the nightly refresh for new accounts. For this, you need to specify the parameter scheduleRefresh=true.
Tag
| Parameter | Default Value | valid values |
|---|---|---|
| tag | none-set | {string} |
It is possible to add a custom tag to a specific connected account which will be later returned into the API or with a webhook callback response.
This feature can be useful when reconciling Flinks LoginIds with end users, for example.
MaximumRetry
| Parameter | Default Value | Valid Values |
|---|---|---|
| maximumRetry | 99 | 1 to 99 |
By default, Flinks Connect doesn't limit the number of times the end user can attempt to enter their login credentials. You can limit these attempts in order to prevent your end user from being locked out of their account for entering the wrong credentials too many times. Specify the maximum number of attempts by using the parameter maximumRetry.
Stringify
| Parameter | Default Value | Valid Values |
|---|---|---|
| stringify | false | true, false |
If you need to have all your events from the Event Listener as strings instead of JSON, specify the parameter stringify=true.
Session Storage
Flinks Connect relies on the session storage feature from your users' browser in order to work properly.
If we detect that the browser does not support this feature we will prevent Flinks Connect's usage and display a message explaining why. Flinks Connect will also trigger the JS event {step: "SESSION_STORAGE_BLOCKED" }.
Another JS event is triggered when the user clicks on the retry button {step: "SESSION_STORAGE_BLOCKED_RETRY" }. The parent page (not the iFrame) needs to be reloaded if this event is triggered.
If the user activates the cookies / session storage feature, the browser will reload the parent page and the iframe will work as expected.
We use the word cookies in the message because most browsers will disable session storage when disabling cookies.
oAuth Full Redirect Parameter
For some institutions on Investments we currently leverage their oAuth Connectivity (direct API’s). This allows the client to be redirected to that institutions login page directly to complete the flow.
This flow must be taken into account when integrating Flinks Connect. By default, we handle this natively within Flinks Connect using a ‘pop-up’ to present the oAuth process to the end user, once the end-user completes the process in the pop-up, then it will automatically close and the user will see a successful connection and redirect as appropriate.
If a ‘pop-up’ process does not work for your implementation, you also have the option to force a redirect of the page to the oAuth process. You can enable this by using the parameter oauthWindowRedirect=true - using this parameter in the Flinks Connect URL will force the entire page to redirect to the oAuth institution. We will then redirect the user back to the iFrame URL once the connection is established. If you go down the forced full window redirect - we highly recommend implementing a full redirect URL in Flinks Connect.
| Parameter | Default Value | Valid Values |
|---|---|---|
| oauthWindowRedirect | false | true, false |
If you require these connections, please reach out to our team to chat about how to integrate correctly.
Note on oAuth Redirect
It is very important that you consider the integration of a pop-up and/or a full redirect to oAuth within your integration and wether you need to use the above parameter. For any questions, please reach out to our team.
Updated over 1 year ago
