- Increase your application volume and reduce drop-off by giving users a faster, simpler way to share their financial data.
- Save time and costs associated with manually reviewing statements.
- Automate your current document-processing flows.
- Add an extra layer of security that includes robust fraud detection with actionable verdicts: Trust, Normal, Warning, or High Risk documents, allowing you to be confident in the data.
How it works
Flinks offers two ways to enable document uploads in your flow: Primary or only as a Fallback. However, you can also send your users a direct link to an upload only flow. You must choose one of these configurations.Upload bank statements in Flinks Connect - Primary option
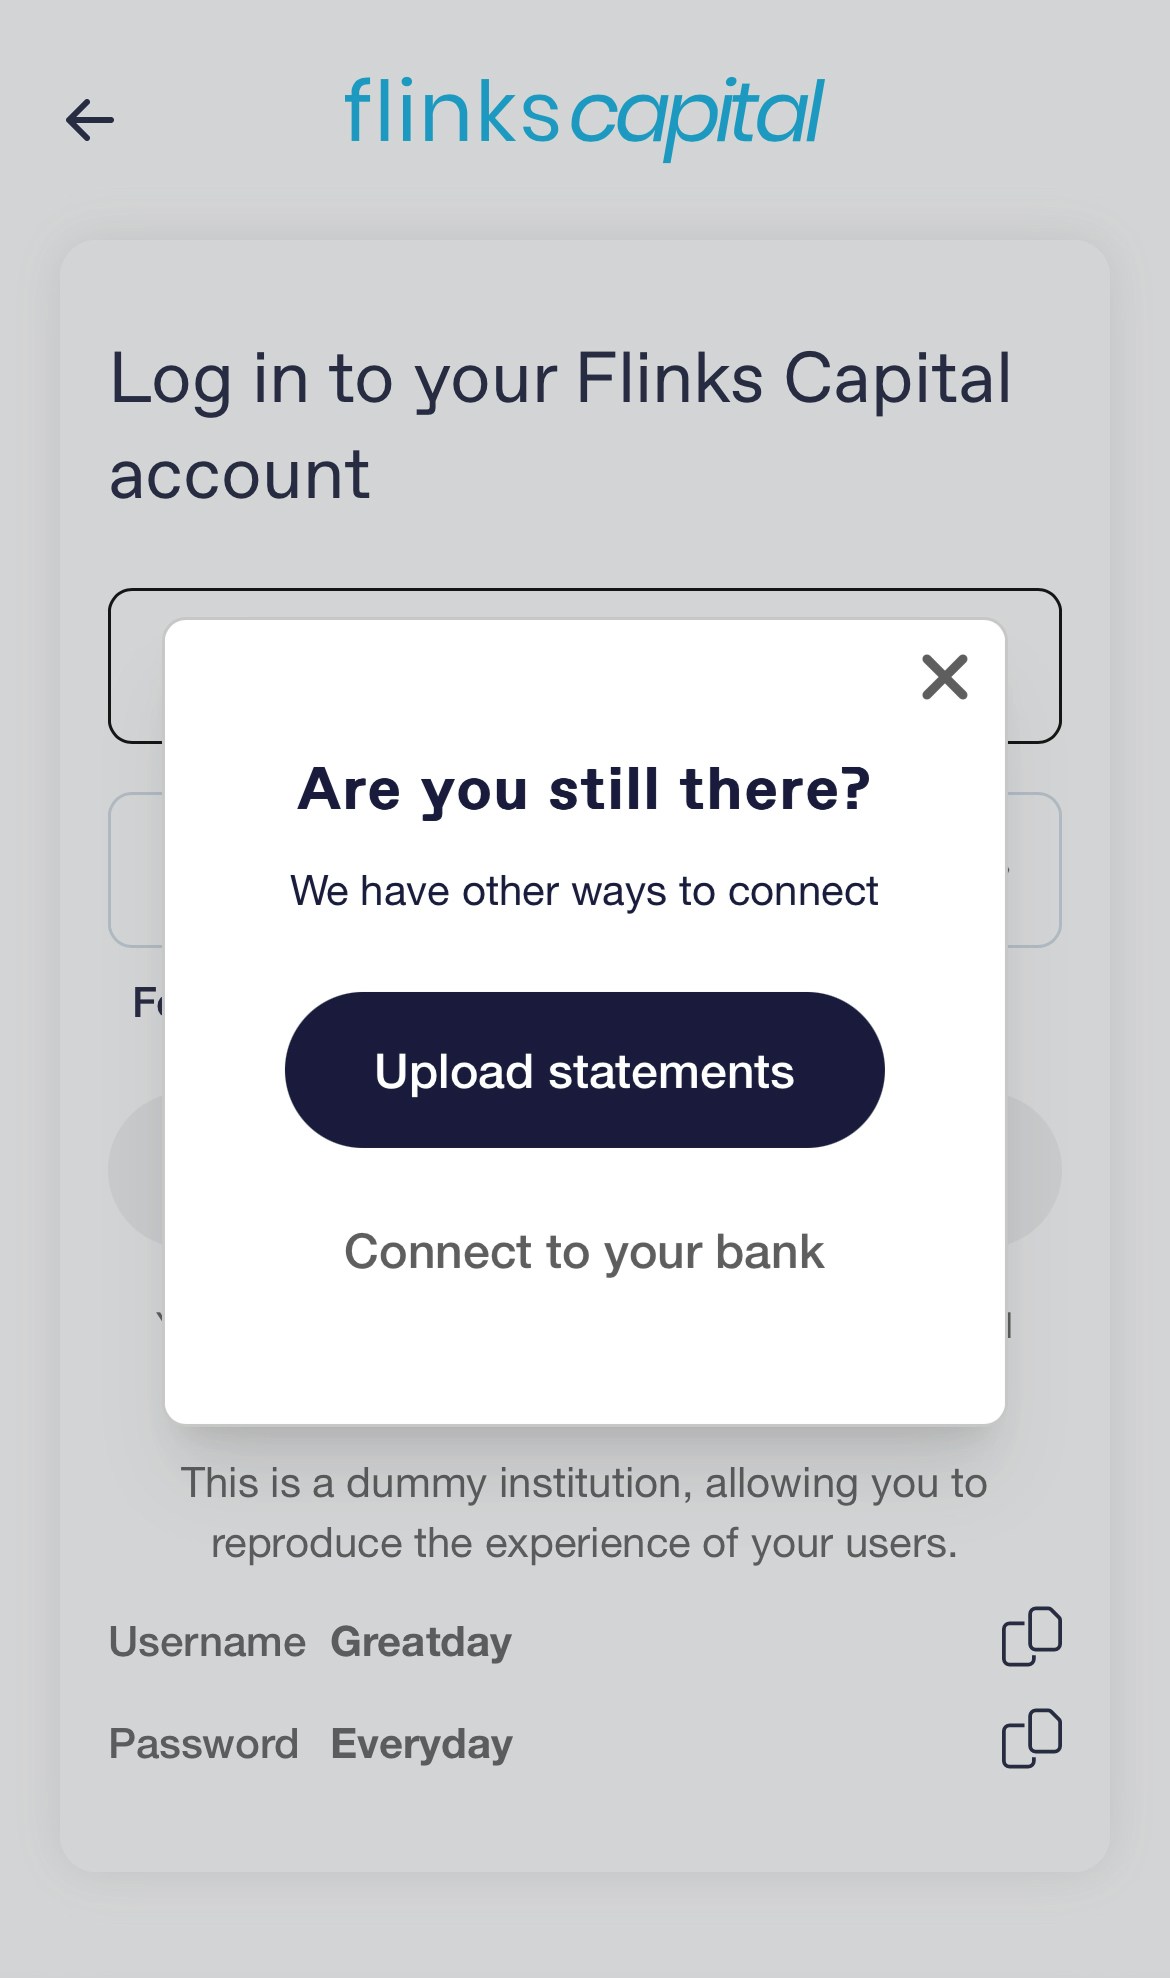
When set as the Primary option, users will see the choice to either link their bank account or upload bank statements right after selecting their institution. Additionally, the fallback logic (e.g., if login fails or the institution isn’t listed) is also enabled under the Primary configuration. This ensures that users can always upload statements if direct bank connection doesn’t work. In other words, the “fallback” behaviour is built into the Primary setting.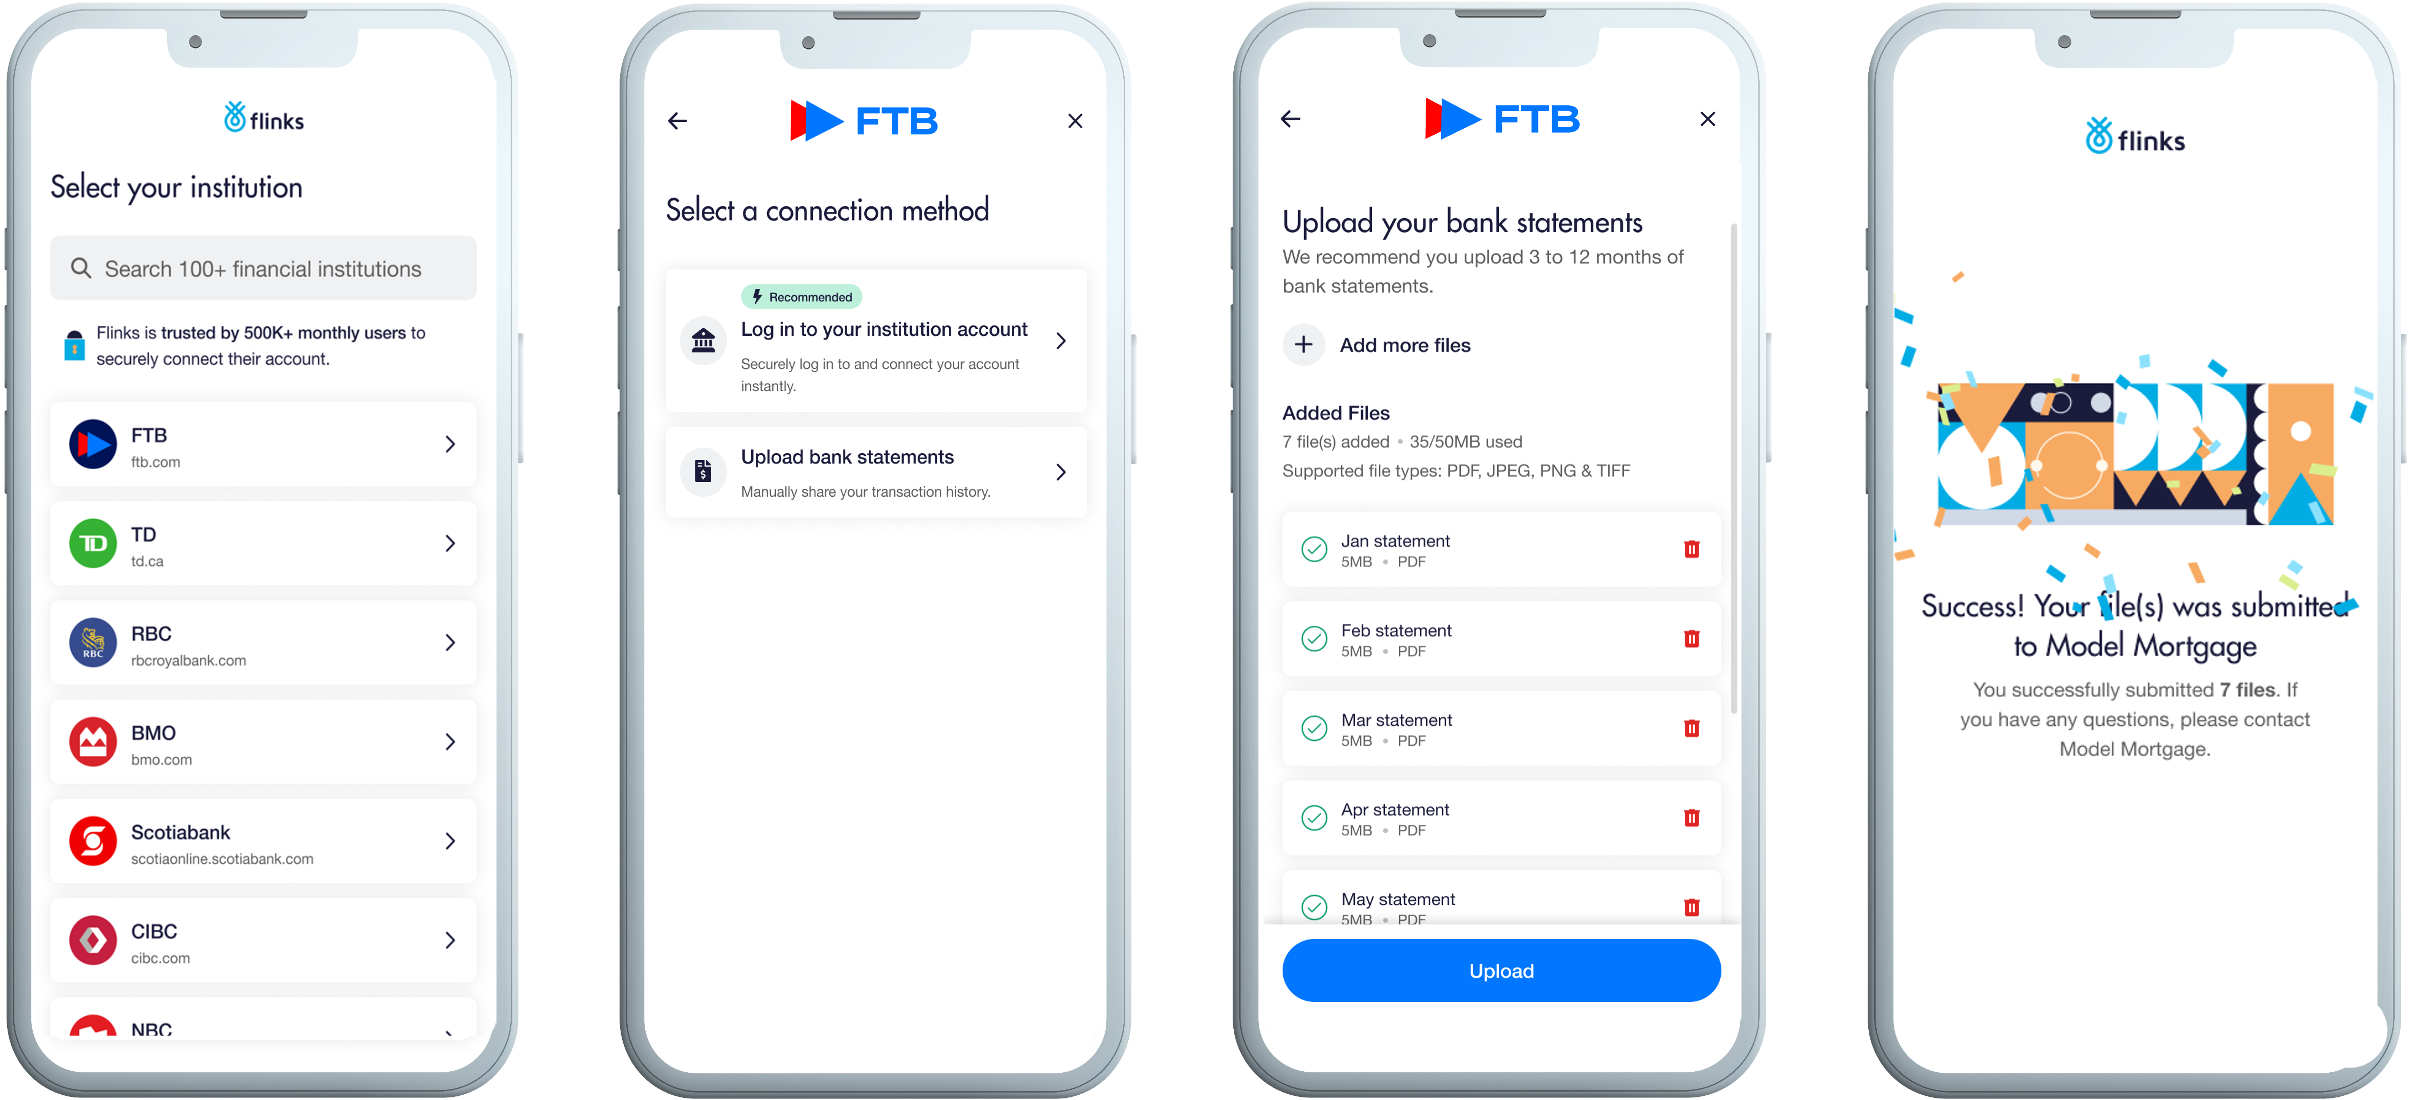
Upload files as a Fallback option
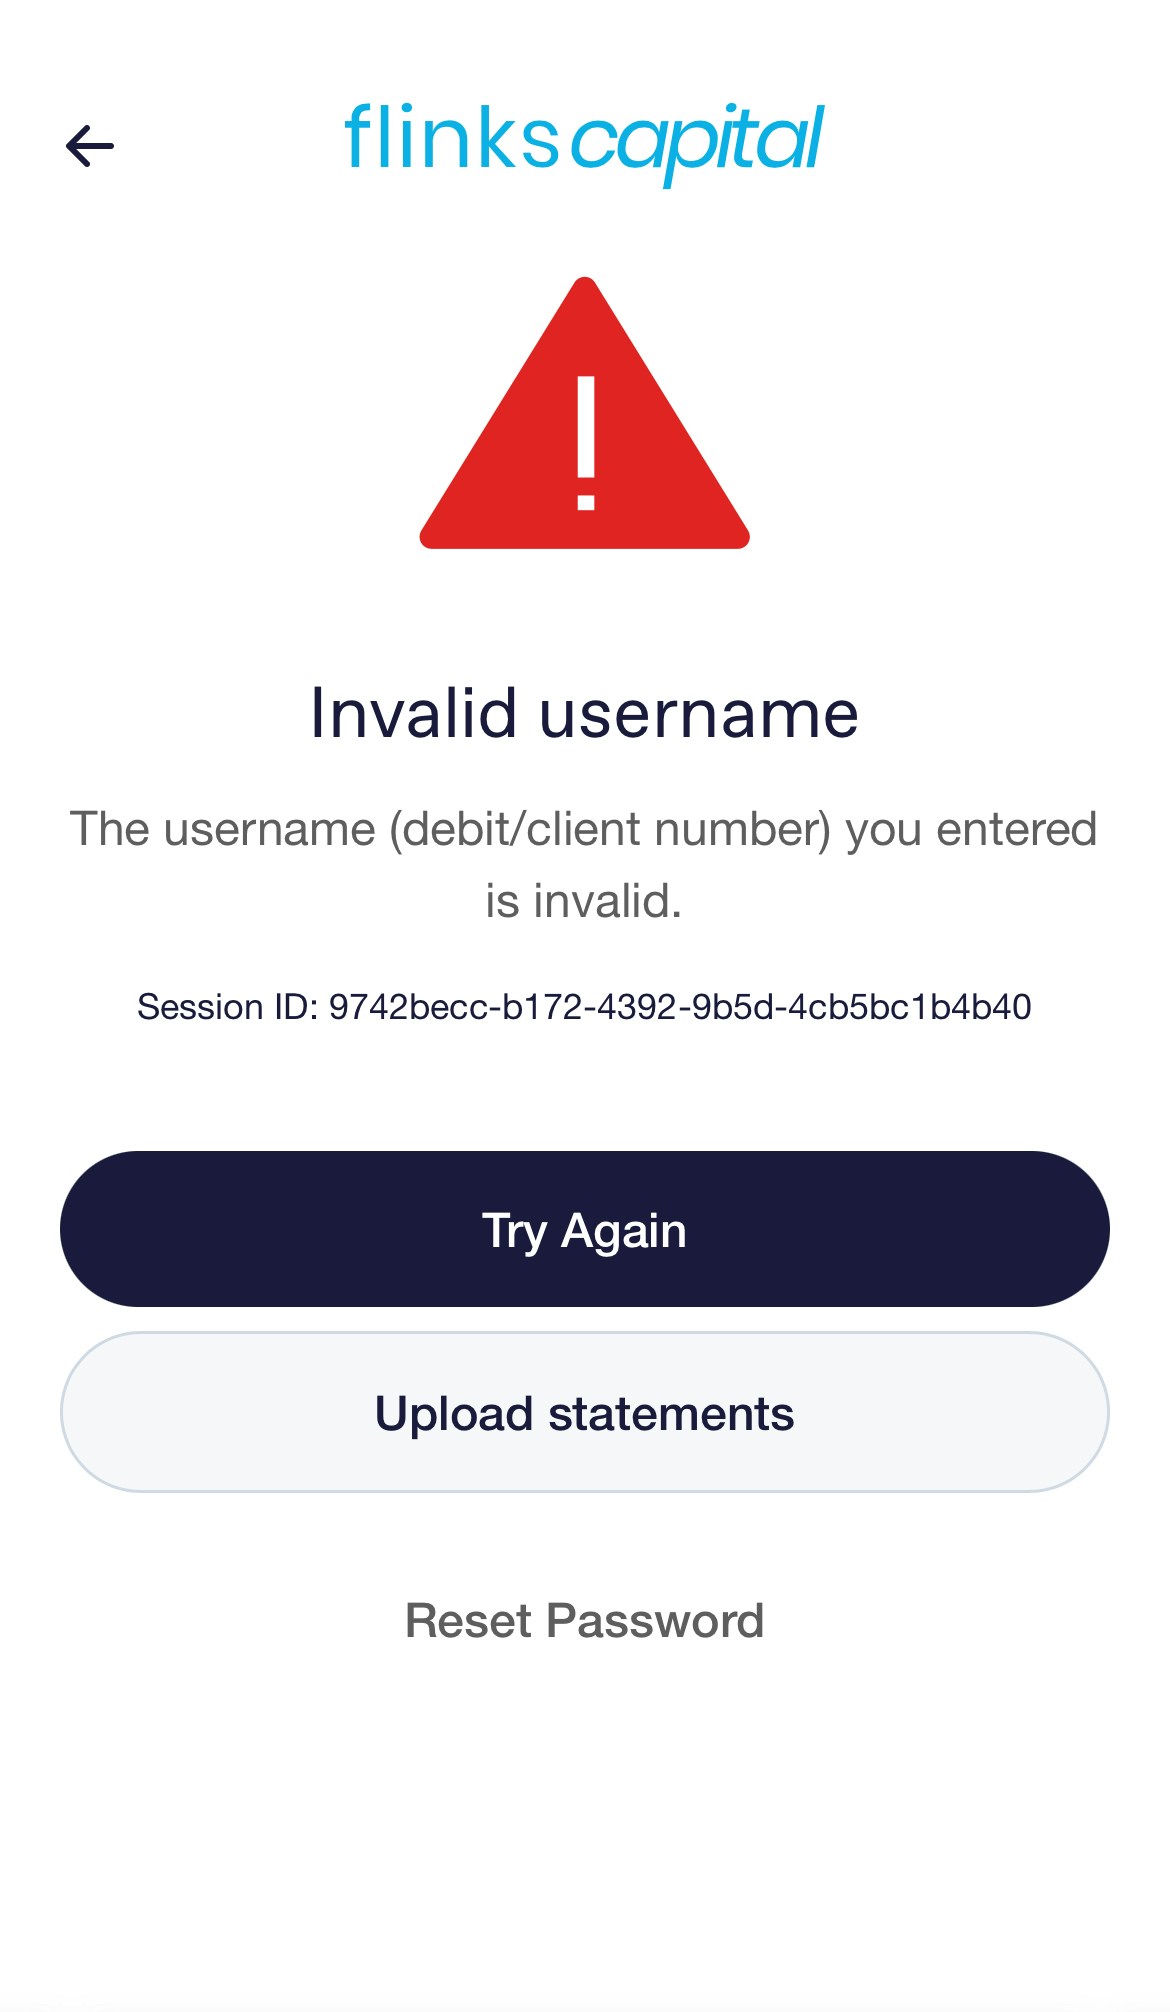
With Fallback enabled, the “connection method” screen is disabled and users are first required to attempt to link their bank. If they encounter an issue, such as a failed login, wrong credentials, inactivity, or an unlisted institution, only then does the option to upload bank statements appear. The user can’t find their Institution when searching in the institution list.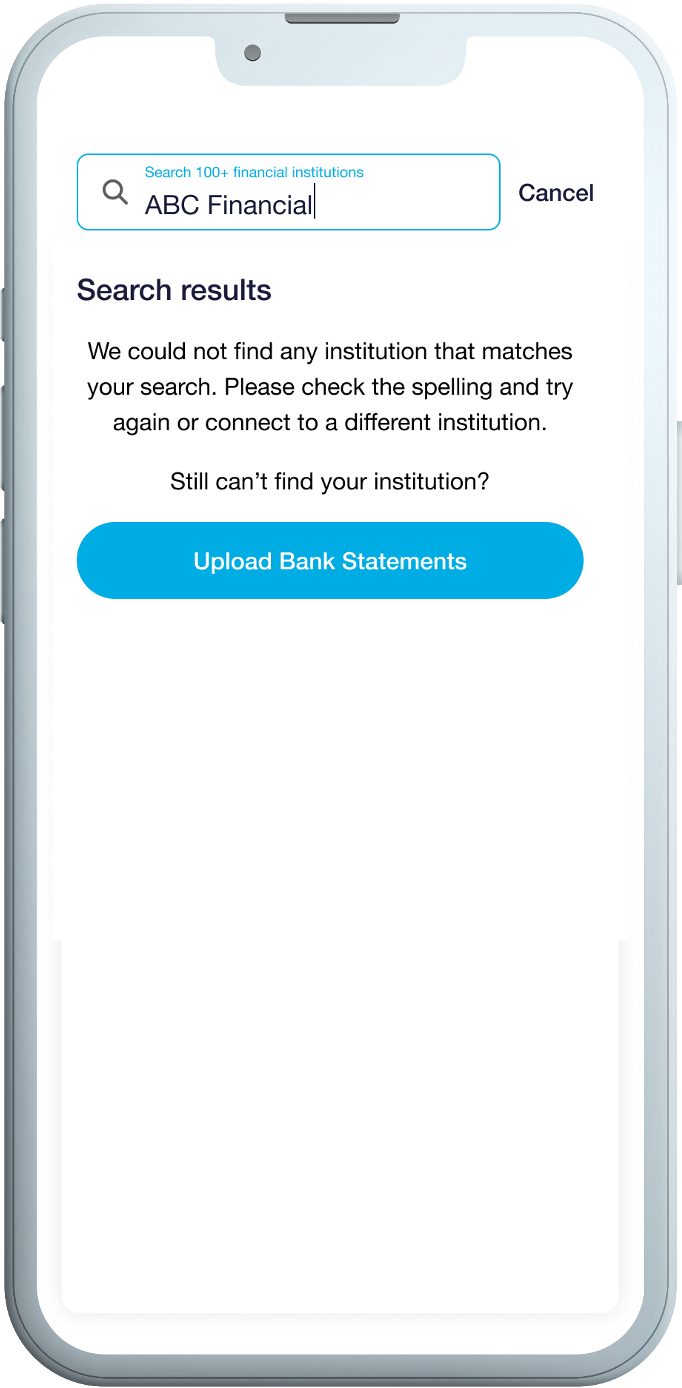
Send users a direct link to upload documents
By adding/Upload to your Flinks Connect URL, you can also send your users to an upload-only flow.
By using parameters in Flinks Connect, you can customize the wording to specify how many bank statements you want to collect from users.
Enable Upload in your Flinks Connect integration
Flinks Upload is a feature that you can enable in both Flinks Connect and in your Flinks Dashboard which processes and extracts data from a bank statement. Before following the instructions below, ensure that you have already set up Flinks Connect. Then, let your Flinks Representative know that you want to start using Flinks Upload. They will walk you through the following steps:- Choose which upload screens you want to enable. For more information about the screens you can choose from, see How Upload works.
- Choose how you want to receive an alert when a fraud signal is detected in an uploaded file. You can:
- Be alerted via a notification
- Set up Webhooks to deliver fraud alerts to you automatically
- (Optionally) Customize the text on the upload screen.
- (Optionally) Set up even listeners if you want to take action on any of the following JavaScript events: - Upload component is loaded (
COMPONENT_LOAD_UPLOADconf)- Files are added or removed (
UPLOAD_INPUT_CHANGE) - A fraud signal is triggered by our statement validation service (
UPLOAD_INVALID_FILE) - User clicks the Continue button in Flinks Connect (
UPLOAD_SUBMIT) - Upload fails (
UPLOAD_ERROR)
- Files are added or removed (
- (Optionally) Call the /FraudAnalysis endpoint to check if any fraud signals were detected.
Upload a file
Flinks Upload is a feature that you can enable in Flinks Connect and in your Flinks Dashboard that processes and extracts data from a document. there are two ways that you can upload a file using Flinks Upload:- Upload a file through your Flinks Dashboard
- Upload a file through Flinks Connect
Upload a file through your Flinks Dashboard
Complete the following steps to upload a file in your Flinks Dashboard:
- In the Dashboard, navigate to the Insights screen, then go to the External Data tab.
- Select Import PDF.
- Select the file(s) you want to upload. You must select files for a singular customer at a singular financial institution. [componentCallout component] [componentCallout component]
- Enter a unique identifier to describe the file(s) you’ve selected, such as a customer name. This is used to identify the files when we deliver the extracted data to you.
- Select Import Files. You’ll see a success message if we successfully receive your file(s). If you receive an error message, try uploading the files again at a later time.
- Review the upload status to check if the data is finished processing. Data is typically ready to review within 10 minutes of uploading, but in some cases it may take up to four hours to process. [componentCallout component]
Upload a file through Flinks Connect
Complete the following steps to upload a file in Flinks Connect.- Depending on the screen you see, complete one of the following:
- If you are on the Upload PDF Statements screen, continue to step 2.
- If you are seeing the upload option after experiencing a bad connection, select Upload PDF statements.
- If you are being asked to choose a connection option, select Upload bank statements.
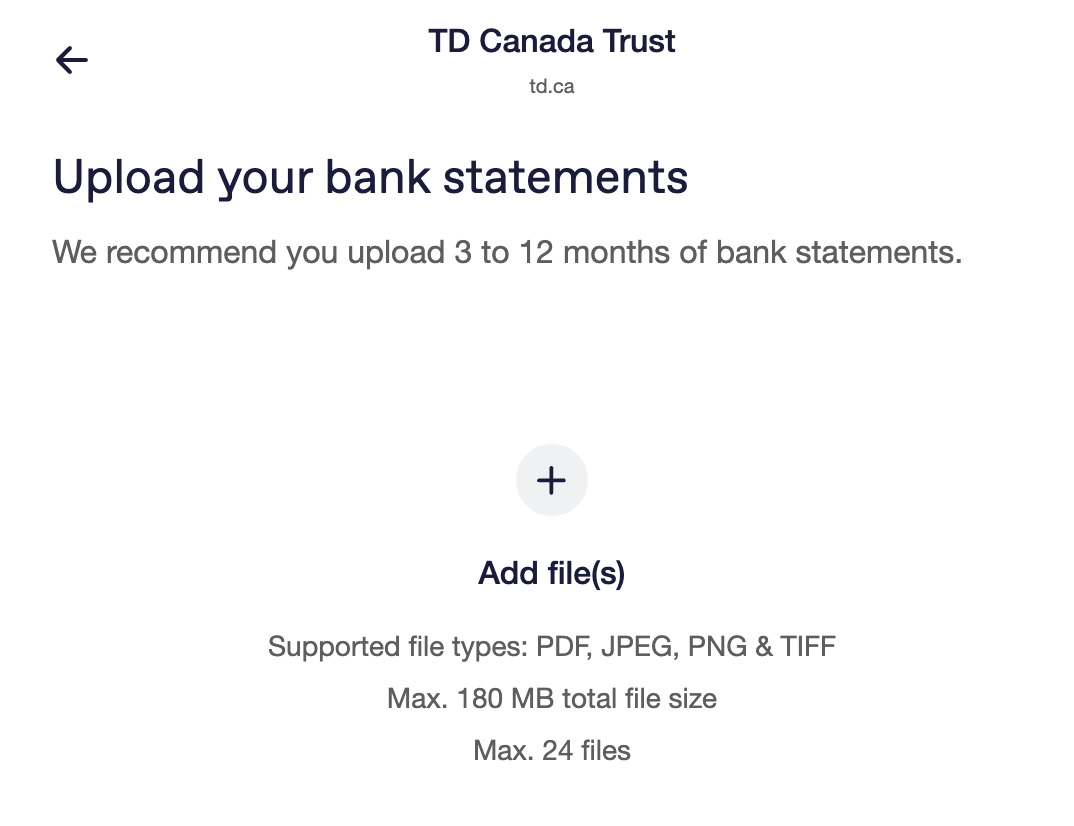
- Select Browse and then select the file(s) you want to upload.
- Select Continue. You’ll see a message if we successfully receive your file(s).
- Review the upload status to check if the data is finished processing. Data is typically ready to review within 10 minutes of uploading, but in some cases it may take up to four hours to process. For more information about how to review processed data, see Receive Your Data.
Check for fraud
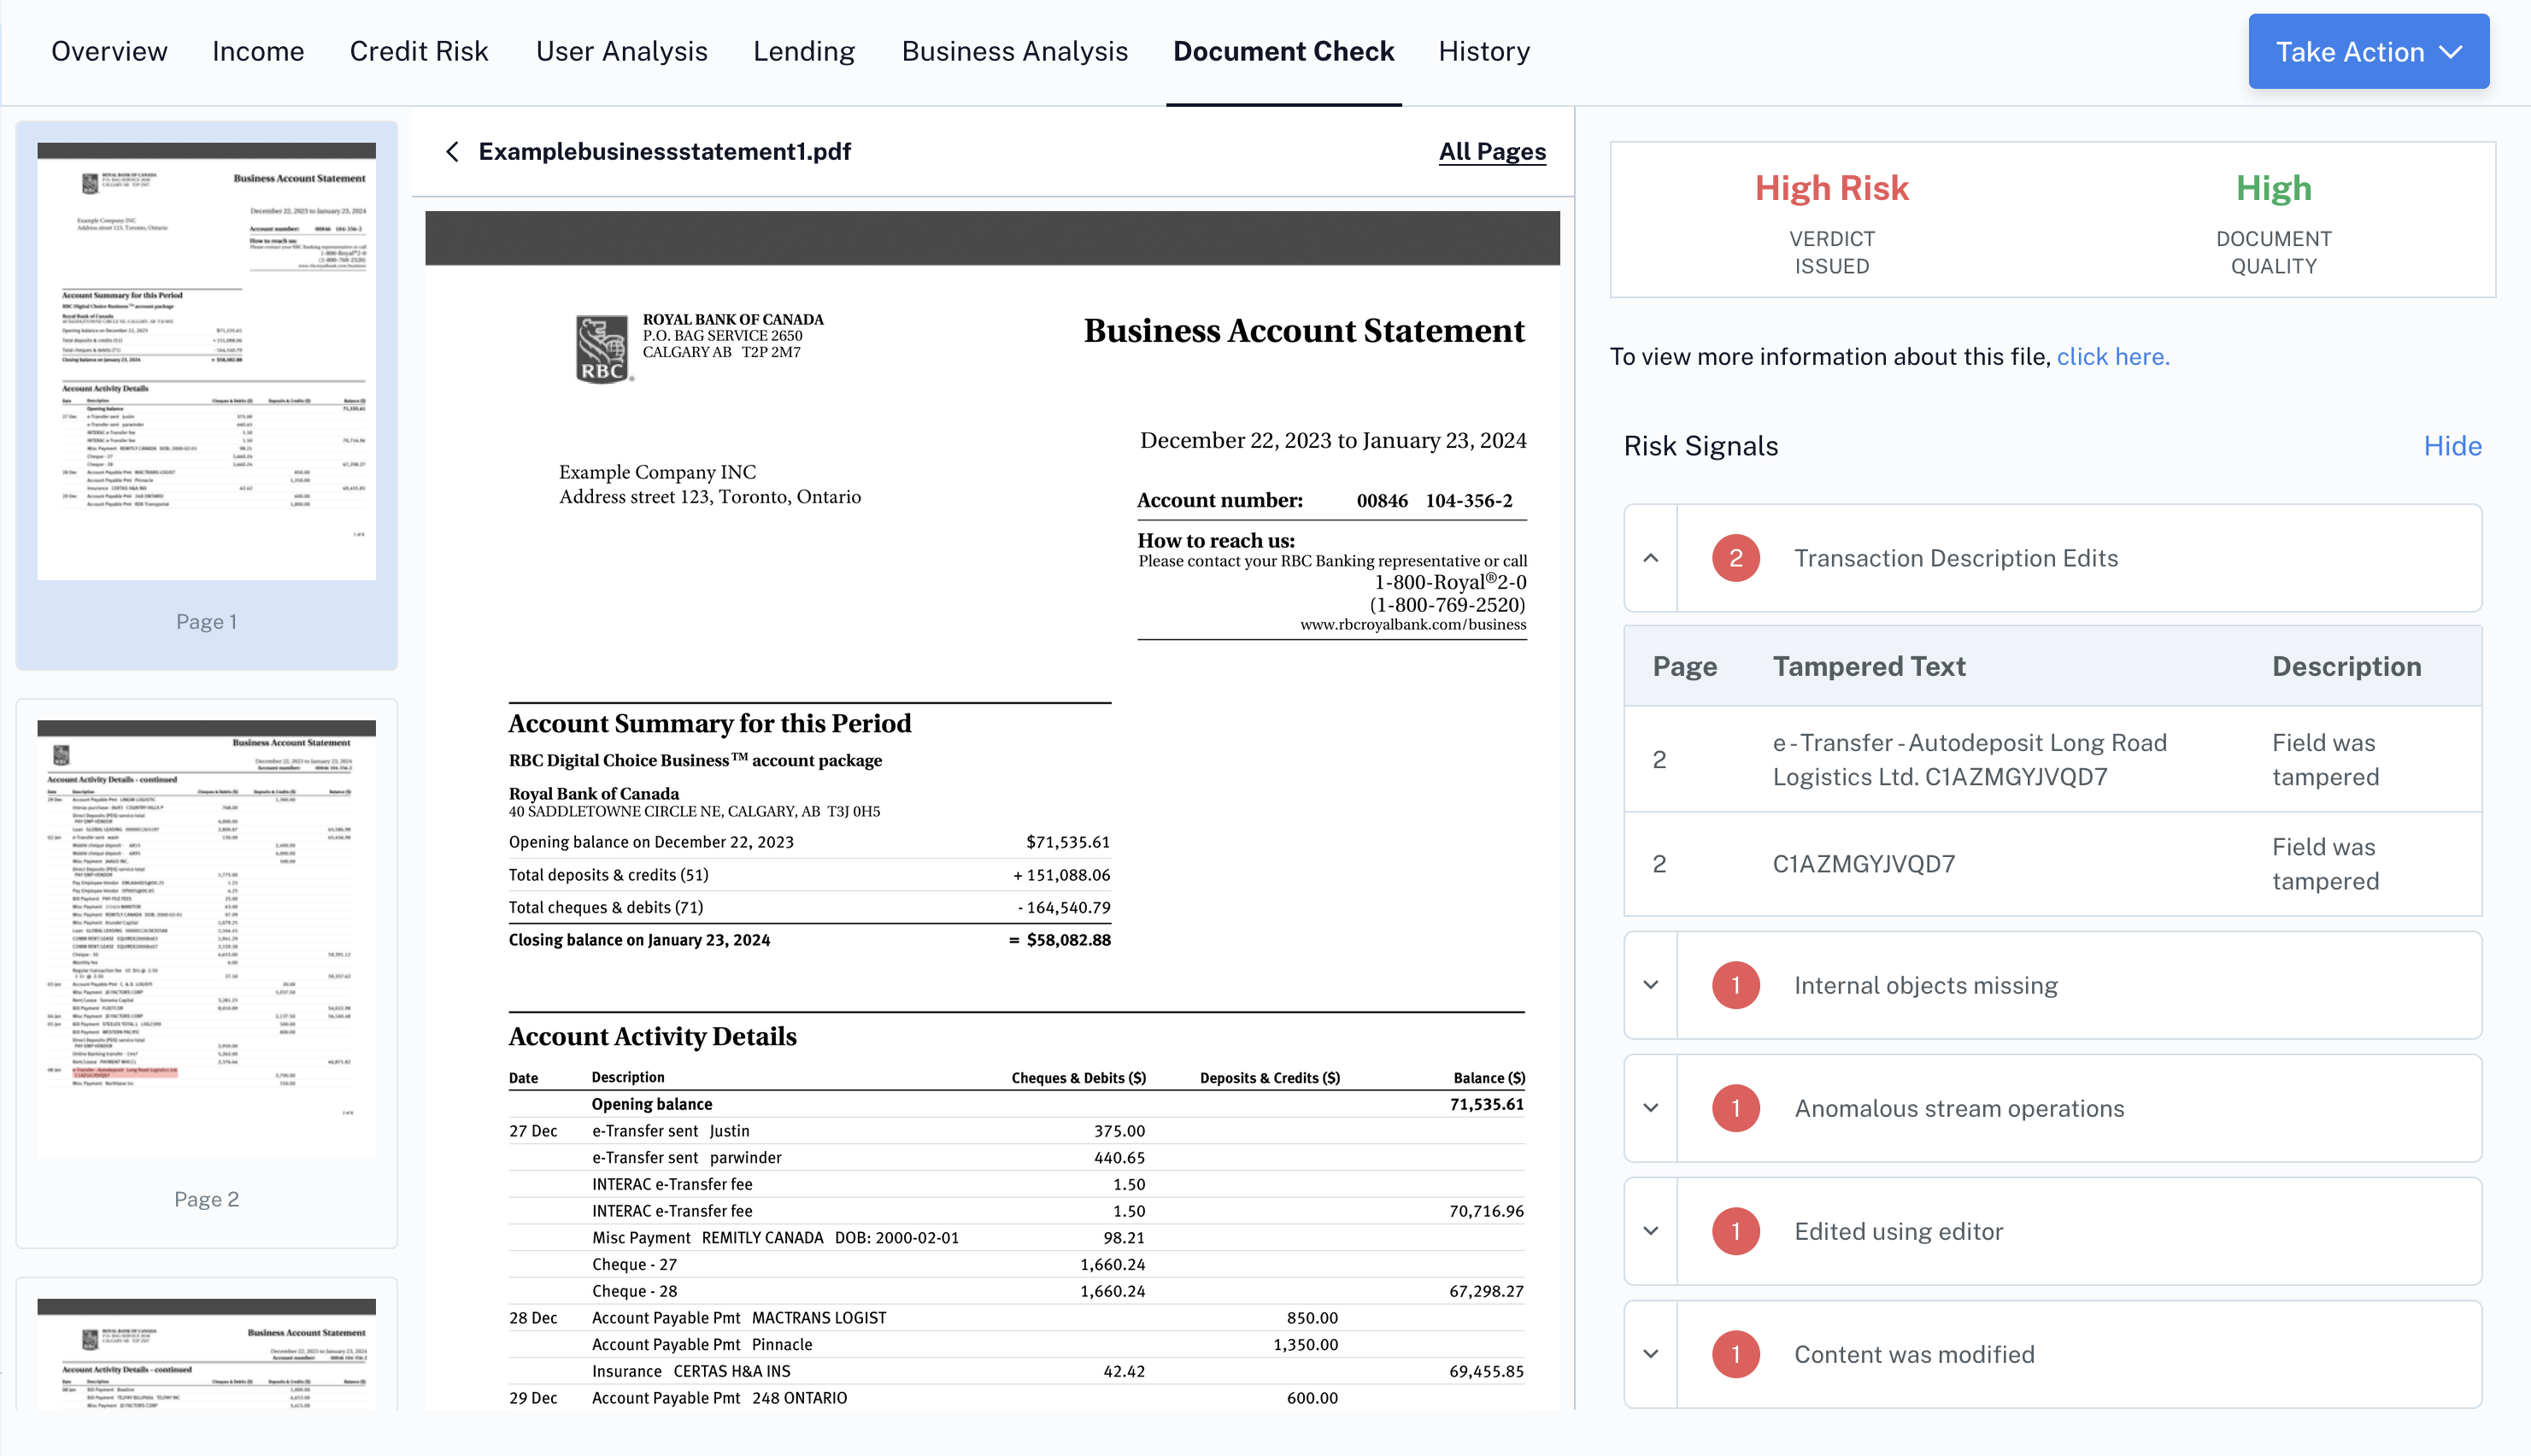
Flinks checks every bank statement that is uploaded through Flinks Upload for several signs of fraud. Complete the following steps to check the verification results:- In the Dashboard, navigate to the Insights screen.
- Locate the name of the customer that you want to review the statement verification for, then select on that row.
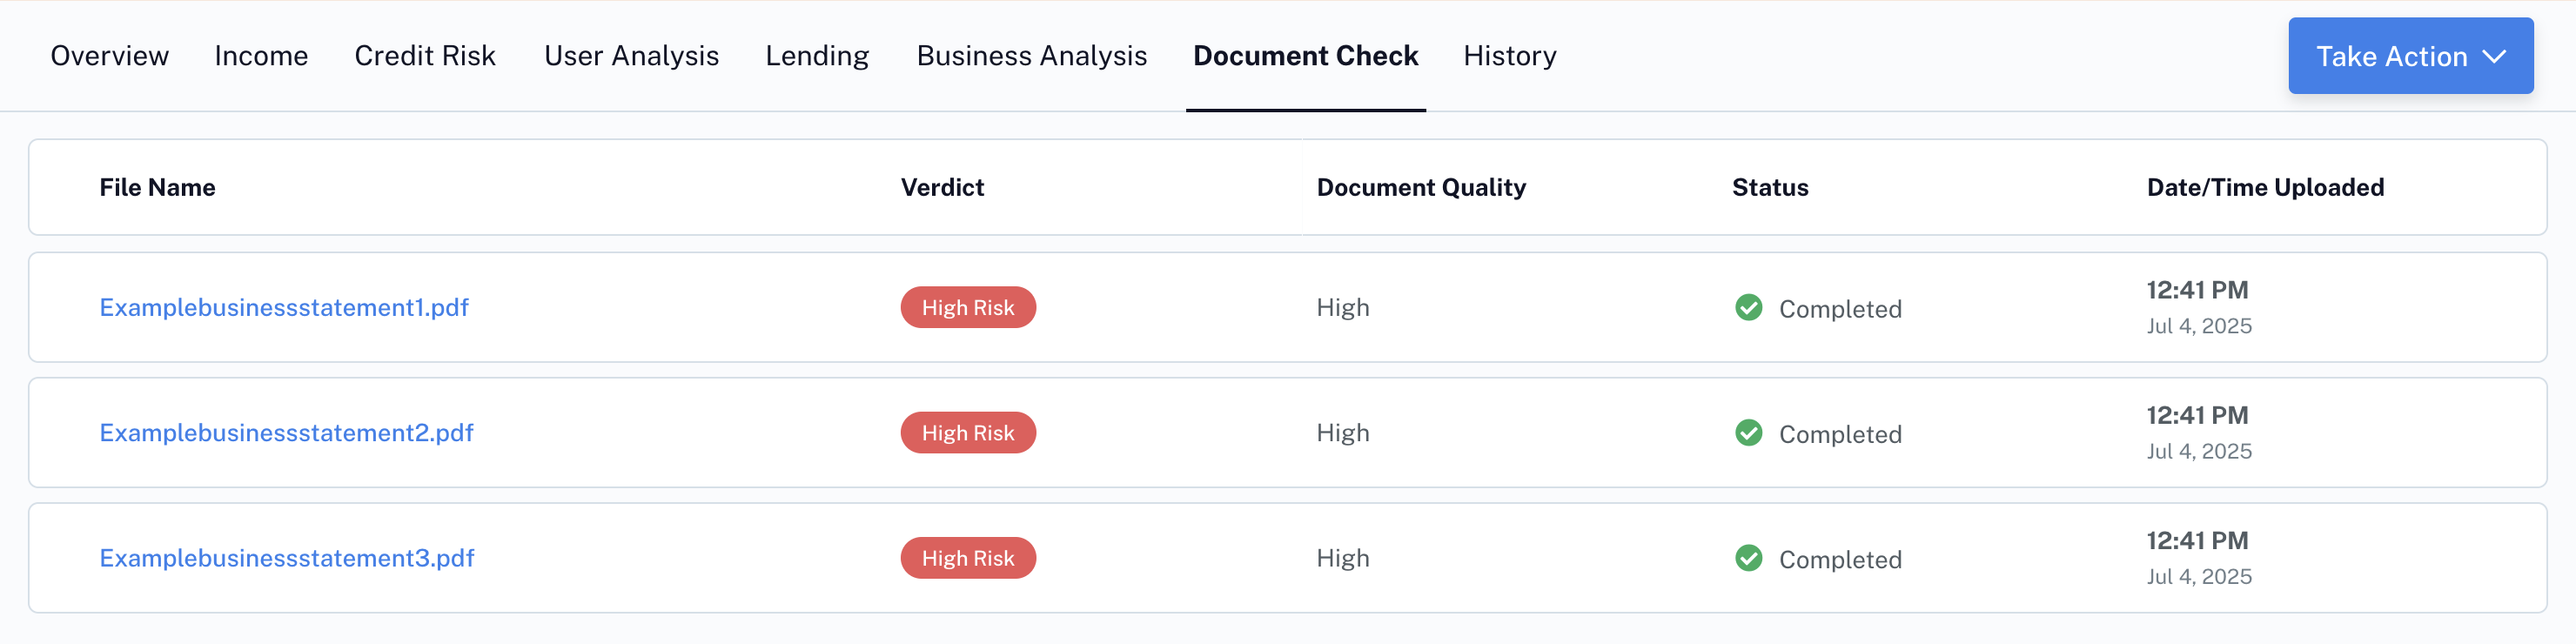
- Go to the Document Check tab.
- This will show a list of all files uploaded for that user, including fraud verdict and document quality.
Receive fraud signals by API connection
To receive fraud signals by API, call the /FraudAnalysis endpoint.List of fraud signals
Flinks checks every document that’s uploaded through Flinks Upload. We return a verdict and any fraud signals we’ve found. To review the verification results of an uploaded file, see Check for Fraud.Verdicts
Fraud Signals
Receive Your Data
You can review processed data from the files you’ve uploaded using two methods:- In your Flinks Dashboard
- By calling our APIs
Access your data in the Flinks Dashboard
Complete the following steps to accept your processed in your Flinks Dashboard.- In the Dashboard, navigate to the INSIGHTS screen.
- Locate the name of the customer whose upload you want to review.
- Check the Financial Institution and Time/Date fields to confirm that the statement is the most recent one.
- Review the Request Status field to check if the upload is finished processing.
- If the Request Status field is showing as Completed, click on the row to review your insights.
- Review your processed data. If you are receiving other Flinks insights, such as Attributes, you can also access that data here.
- (Optionally) Check for fraud to see if we’ve identified any fraud signals.

Access your data by calling our APIs
Call one of the following endpoints, depending on the type of data you want to receive:- To receive processed data for bank statements, call the /GetAccountsDetail endpoint.
- To receive information about any fraud signal(s) that were detected in an uploaded file, call the /FraudAnalysis endpoint.